
Hatching Eggs
An educational experience
Buying in hatching eggs (fertile eggs) is the most economical way of starting or adding to your existing flock. This can be either done using a trusted broody hen or using a reliable brand of incubator. Heritage breed hatching eggs can be purchased from a reputable breeder and couriered to most places in NZ. Buying from a reputable source will ensure the eggs are handled and stored correctly.


Breeding Stock Must Be In Good Health
A dozen hatching eggs does not automatically equate to 12 fluffy, bouncing ‘pullet’ chicks! 🐤
At Appletons we set hatching eggs weekly during the season so fertility is regularly monitored in all our breeding pens. Caring for our breeding stock is key to producing viable eggs that have good fertility and hatchability. We select the best of our birds for type, vigour, vitality and utility. Our breeders are well housed all year round with daily access to sunshine (vitamin D is essential) and free range. Our hens are well rested during the 'off season' and kept well feed during this down time too!
It is very important not to do your girls hard when they are not laying. We feed our flocks a premium quality complete ration. The protein content needs to be high and is best made up of both animal and vegetable proteins. Animal proteins (like blood, meat and bone meal) are a richer, more complete protein and it has been proven that hens fed on ruminant protein have a better rate of fertility, hatchability and go on to produce more vigorous chicks. Remember the developing embryo and utimately the chick especially in its first couple of days relies totally on the nutrient content of the egg. So the best start can make all the difference to making it to hatch day and ultimately point of lay.
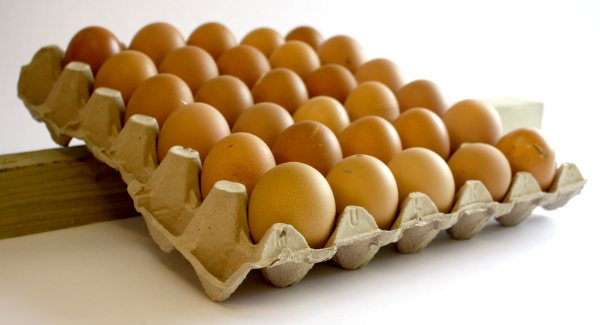
There are some important factors to consider when purchasing hatching eggs.
Tips on Getting the Best out of your Hatching Eggs
Care of Eggs
Eggs received through the mail or via courier will need to settle for at least 24 hours. This allows the air-cell inside the egg to return to its normal size. Eggs should preferably be stored with the pointy end down while they are ‘in the hold’. It's a good practice to follow and it will help your hatch. We don't recommend turning eggs during the first 24 hours if couriered.
It is best practice to set hatching eggs within 48 hours of receiving. Keep them in a cool place, in the garage or the coolest room in the house. The best condition for your eggs is 10 degrees C and 50% humidity whilst in storage. Older fertile eggs will hatch satisfactorily if properly stored but fertility does decline the longer they are stored. Never place them in the fridge unless you plan to scramble them! The refrigerator dries the eggs out, and really does affect the eggs hatchability. Avoid subjecting hatching eggs to rapid temperature changes or fluctuating temperatures.
Storage & Marking of Eggs
Store eggs correctly
Eggs should be turned twice or more times daily to allow the egg contents to move about and not become stuck to the shell. The best way is to sit the eggs ‘pointy end down’ in an egg carton then rotate the carton on a block of wood or book.
Best not to clean your eggs. The cleanliness, soundness and integrity of the egg shell influence the hatch. Do not set cracked or eggs with thin areas where inadequate calcification has occurred. Cracked or thin shells allow microbial contamination and excessive evaporation from the egg during storage and incubation. Washing removes the protective cuticle, making the egg more susceptible to contamination.
A pencil is best to mark eggs ✏️
When marking your eggs, use a good, old-fashioned pencil. Never use a permanent marker. Remember, anything can travel in and out of an egg. If you are wondering if the chemicals in a marker are good for a peep's development, touch it on your tongue once, or just smell it! Make as small, and as few marks as possible, because every mark you make plugs pores in the shell. If you don't feel the need to mark anything, then don't.


Brinsea Ovation 56 Advance Incubator
Incubator Ready?
By the time you have your eggs ready your incubator should have been running at least 24 hours so that the temperature and humidity are stabilized. 🥚
This gives you time to learn what's going to happen in your incubator and allows you to make any necessary adjustments before setting your eggs. To avoid excessive thermal shock to the eggs, allow them to warm to room temperature before placing them in the incubator. Sweating occurs when cool eggs are exposed to a sudden increase in environmental temperature or relative humidity.
Invest in a good quality candling lamp and candle eggs on day 7 to 10. On candling remove all non-fertile (clear) eggs and any eggs found to be leaking, cracked, or mouldy should be removed and disposed of immediately. Such eggs can explode because of high microbial populations. The released odour is very offensive and would require expedient removal of all the eggs. By candling and removing eggs it not only removes the risk of contamination but also frees up the incubator especially if space is at a premium and you consecutive settings. We candle again on day 18 and remove any eggs with embryos that have died.
Brinsea Incubators


The 4 Key Points to Incubation
The four KEY considerations when using an incubator are correct:
- Temperature
- Humidity
- Turning
- Ventilation
Get any of these wrong and your hatch might not happen!
All You Need To Know About Incubation
Using a reliable trusted brand of incubator also makes a huge difference in the hatch results.

Brinsea Maxi 24 EX Incubator. Using a reliable trusted brand of incubator also makes a huge difference in the hatch results.

This chick is pipping; chipping away to make its way out of the shell.

This chick has just hatched. An exhausting process!
Broody Hen Ready?
Make sure your broody hen is dedicated and sitting tight before you place any hatching eggs under her. 🥚
Leave her to sit on some fake broody eggs to be doubly sure she is a committed mum-to-be! Best to not let her sit in the hen house with the other layers. Move her to a separate coop so there are no distractions and no other hens can lay in her nest. Make a nest for her using an clod of upturned grass to keep the humidity levels correct. Sitting up off the ground in a high nest box on shavings can sometimes be too dry and affect humidity during incubation and once the chicks hatch they will not be able to go back to the nest due to the height. Do not let her sit on too many eggs either as she will not be able to cover them all and some will chill before she rolls them back under her. Make sure she is fed and watered every day.Check her and the nest regularly for mites and lice. We sprinkle diatom on the nest for red mite control and it works well. If your broody hen hops off the nest for too long periods of time (half a day or more) or only chooses to sit at night then the eggs will cool and not develop - a hen that does this is not a committed broody!
Incubation Times
The normal incubation time of most chickens is 21 days.
Ringneck Pheasant eggs are 23/24 days,
Guinea Fowl are 27/28 days,
Red legged partridge 23/24 days.
Muscovy 34/5 days.

Happy Hatching!
Appletons Guide To Raising Your Own Chicks
Always remember when purchasing hatching eggs they does not come with any guarantees of every egg hatching. We are dealing with Mother Nature, 'the courier man/postie' plus 'the incubation' process....and as the well know saying goes...never count your chickens till they have hatched! 🐣